A factory certificate and a failed installed leak test can both be correct. The first describes a filter tested under defined conditions before dispatch. The second examines an installation after transport, handling and mounting, using the specified site method. Treating those two records as contradictory wastes the first hour of an investigation.
The useful question is: what changed between the two tests, and which air path produced the failed result? That question leads to evidence. “The certificate says pass” does not.
Factory classification and cleanroom installation testing have different purposes. EN 1822 establishes filter performance classes; ISO 14644-3 covers cleanroom test methods. A passing factory result does not certify a ceiling assembly that had not yet been built. EN 1822-1:2019, ISO 14644-3:2019.
Freeze the evidence before touching the clamps
Do not begin by tightening every fixing or applying sealant around the perimeter. Either action can change the symptom and erase the information needed to distinguish a mounting problem from a damaged filter.
First associate the physical filter with its certificate: model, serial number, dimensions, class, test airflow and orientation. Record the installed location separately. A certificate filed under the right room name can still belong to a different filter.
Then preserve the failed test record. It should identify the method and acceptance criterion, instrument, aerosol, upstream reference, operating airflow and the location of each repeatable indication. A photograph or drawing marked with coordinates is more useful than “leaking near the edge.” Mark whether the indication lies over the media, the media-to-frame bond, the external gasket or an adjacent housing joint.
Photograph packaging damage and the installed condition before removal where possible. Keep transport observations separate from conclusions. A crushed carton warrants inspection; it does not prove that a particular leak came from transport.
Check that the failed measurement is valid
A suspect result must be investigated, not simply discarded. Equally, replacing filters cannot correct an unsuitable test setup.
Confirm that the challenge aerosol reached the region being evaluated and that the upstream sample represents that challenge. A test of an unchallenged path proves very little. Upstream uniformity is one of the subjects explicitly covered by IEST's guidance for factory, preinstallation and installed filter leak tests. IEST-RP-CC034.
Ask the test provider to check the zero, reference and relevant instrument settings; sampling-line condition; scan coverage; and the method's required sampling arrangements. These are questions for the approved procedure, not an invitation to improvise a new acceptance limit after a failure.
Also check which percentage is being reported. A photometer compares light-scattering responses across the aerosol distribution. A particle counter counts particles in defined size ranges. Their results are not automatically interchangeable, even when both displays show a percentage. NIOSH: aerosol photometer measurement principles.
An upstream-reference error can shift reported leakage in either direction. ATI specifically documents that possibility for digital photometers. That makes the reference a diagnostic check, not an excuse to ignore a stable, repeatable leak. ATI internal-reference guidance.
Build a change record
Put the factory and site conditions side by side. Leave unknown fields visibly unknown.
| Item | What the comparison can reveal |
|---|---|
| Filter serial and configuration | Wrong unit, certificate or replacement configuration |
| Test standard and method | Different questions being asked of the filter and installation |
| Aerosol and detection method | Results that should not be compared numerically |
| Airflow and pressure drop | A different operating point or abnormal installation resistance |
| Filter and gasket orientation | A seal presented to the wrong mating surface |
| Handling and installation record | Events between the last demonstrated pass and the failure |
| Exact indication location | Which components require closer investigation |
Scroll the table sideways to see all columns →
This table is an investigation tool. It does not rank the statistical likelihood of the causes, because that requires actual failure data.
Follow the leak location without jumping to blame
A repeatable indication over the media calls for inspection of the affected pack region and surrounding support. Look for damage, deformation or a feature that coincides with the signal. Keep the filter in its documented orientation. Changing the frame's orientation without updating the map can make a defect appear to move.
An indication near the media-to-frame bond involves a different interface from the gasket sealing the filter to the housing. Calling both “edge leakage” loses the distinction needed to decide which component is at fault.
A perimeter indication calls for checks of gasket continuity, contact position, compression, the mating surface and frame alignment. It does not prove that the housing is defective; the filter's gasket, dimensional fit or installation can also be responsible.
An indication at a housing joint or penetration calls for evaluation of the assembly itself. Replacing a sound filter will not repair an unsealed air path elsewhere.
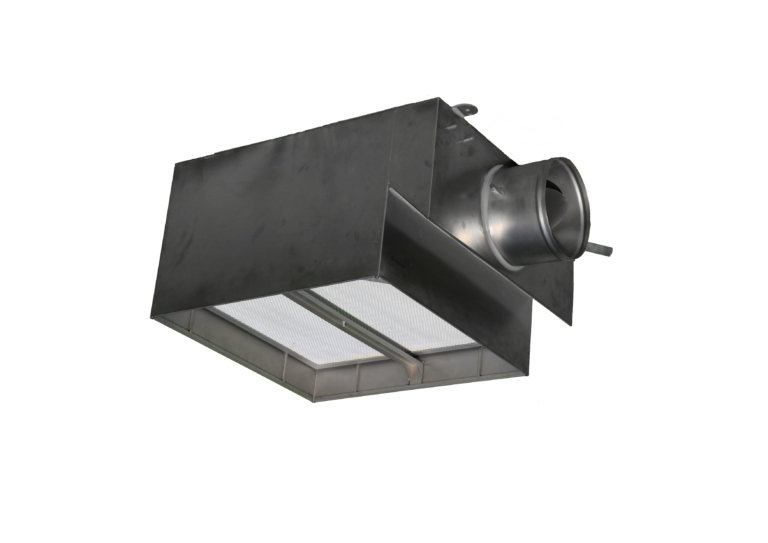
The housing drawing matters here. Ulpatek offers distinct flat, test-groove and knife-edge interfaces, so “a 610 mm HEPA box” is not a complete description of the seal. Ulpatek HEPA filter boxes.
Change one variable, then retest
When the approved investigation permits correction, record the intervention precisely. “Adjusted filter” is too vague. State whether the filter was reseated, the gasket replaced, a damaged mounting part corrected or the entire element changed.
Do not use extra clamp force as a substitute for dimensional fit. Ulpatek's tool-free box instructions explicitly warn that overtightening can damage the filter. The correct mounting action is the one specified for that assembly. Ulpatek tool-free HEPA box manual.
A controlled substitution can help distinguish causes when the equipment owner and test procedure allow it. A replacement that passes in the same location is useful evidence, but it does not by itself establish why the original failed: installation conditions may also have changed during the replacement. Keep the original element available for investigation and preserve its orientation and identifiers.
After correction, complete the required retest and assess whether other qualification checks are affected. An integrity result alone does not establish airflow volume, room pressure, recovery or the required cleanliness classification. In sterile manufacturing, installed filter integrity belongs within a wider qualification programme. EU GMP Annex 1, section 4.25.
Close the investigation with a cause, not just a pass
A defensible conclusion separates the observation, the intervention and the evidence. For example: a repeatable perimeter indication disappeared after a documented gasket replacement and repeat testing. That supports a seal-related corrective action. It does not justify inventing an unseen crack in the housing.
The certificate starts the evidence trail. It does not end it.