A HEPA filter can meet its factory acceptance criteria and still leak around its perimeter after installation. If air is bypassing the gasket through a defective housing seat, replacing the filter will not repair the air path.
A perimeter reading alone does not prove a housing defect: the problem could also be in the filter frame, the sealant around the media pack, the gasket or the installation. First locate the path. Then decide what needs replacing.
A filter frame and a filter housing are different parts
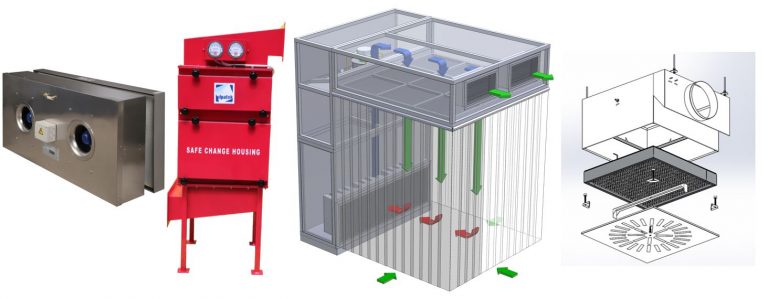
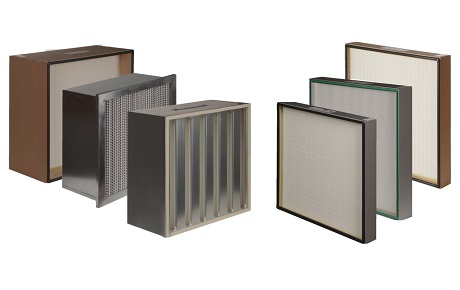
The frame travels with the replaceable filter. It holds the media pack and the material sealing that pack to its edges. The housing stays in the ceiling or duct. Its seating surface meets the filter’s gasket or gel seal, and its clamps hold the assembly in position.
That distinction matters when somebody writes “frame leak” on a test sheet. Which frame? Where exactly did the probe detect aerosol? On the media-to-frame joint, outside the gasket, at a housing corner, or at the ceiling connection?
Ulpatek’s HEPA filter boxes illustrate why the interface must be specified: flat seats, test-groove arrangements and knife-edge seats are separate configurations. They are not interchangeable descriptions of the same opening. The matching filter seal must be selected with the housing. Ulpatek HEPA Filter Box specifications
What the factory certificate does—and what remains to be checked
A factory filter test assesses a filter element under defined conditions in a test fixture. An installed test assesses it after transport and installation, with the mounting interfaces that now surround it.
The test fixture at the factory is not your ceiling box. A good result in one cannot certify the gasket seat in the other. A factory pass also cannot rule out damage that happened later.
The standards cover these different stages. ISO 29463-4 addresses leakage testing of filter elements; ISO 14644-3 addresses performance testing of cleanrooms and clean zones. IEST-RP-CC034.5 explicitly covers filter leak testing at manufacture, before installation and after installation. ISO 29463-4:2011, ISO 14644-3:2019, IEST-RP-CC034.5
At Ulpatek, ULPALAB is the internal laboratory used to test our manufactured filters before shipment. That records the filter’s condition before delivery. The installed assembly still needs the checks specified for the project.
Read the leak pattern before ordering another filter
Use the pattern to decide where to investigate under the approved test method. It can narrow the possible causes, but it cannot tell you who is responsible on its own.
| Where the signal appears | What to investigate | Evidence that helps separate the causes |
|---|---|---|
| A small, repeatable spot within the media face | Local media damage or a manufacturing defect | An accurately located scan result and visual inspection without touching the media |
| Along the joint between media pack and filter frame | Pack sealant, frame damage or separation | Close photographs of that joint and comparison with the factory record |
| Along one side of the gasket | Uneven seating, an obstructed seat, wrong seal geometry or insufficient contact | The seat condition and the continuity of gasket contact along that side |
| At one or more corners | Gasket joints, corner damage, housing distortion or unequal clamp loading | Photographs of both mating surfaces and corner dimensions |
| At a housing seam or another connection outside the filter seal | A housing or installation leak path | A test arrangement that actually challenges the suspected path |
| Broadly across the face, rather than at one location | Media penetration, inappropriate acceptance criteria or a test setup problem | Airflow, aerosol, instrument settings and upstream reference information |
Scroll the table sideways to see all columns →
Do not keep changing several things at once. If the filter is reseated, two clamps are tightened and the aerosol setup is altered before the next scan, a pass will tell you little about which change fixed the problem.
The gasket cannot seal against a surface it does not touch
A flat gasket requires continuous contact around its intended sealing line. A seat can look acceptable from below and still have a raised joint, a local depression, debris or distortion that interrupts that contact.
“Housing looks fine” is not enough. Follow the site’s access procedure and examine the entire seat. Check for old gasket material, adhesive build-up, fasteners or weld features crossing the sealing path, and damage at the corners. Compare the seat dimensions and filter dimensions with the approved drawing, including the gasket position.
Include the retaining mechanism in the inspection. Compare its position and condition with the approved assembly drawing, and check that the filter sits evenly against the intended sealing surface.
“Tighten it more” is not an installation specification. Use the supplied instructions for any compression or torque requirement. If those instructions do not define the setting, obtain it before adjusting the retainers.
A gel seal changes the contact geometry. It does not remove the need to check it. Confirm the knife-edge alignment, seal compatibility and engagement against the relevant drawing and installation instructions. Simply ordering “gel instead of EPDM” does not correct a mismatched housing.
A small bypass can overwhelm a high-efficiency filter
Consider an illustrative calculation, not a measurement from an Ulpatek installation. Suppose a filter has 0.005% penetration under the conditions being considered, and 0.1% of the total airflow bypasses it completely.
For equal upstream concentration in both paths and no particle loss in the bypass:
System penetration = bypass fraction + (1 − bypass fraction) × filter penetration
Using fractions rather than percentages:
0.001 + (0.999 × 0.00005) = 0.00104995
That is approximately 0.105% overall penetration, or 99.895% efficiency. It is about 21 times the penetration of the filter path alone.
This is a mixing calculation, not a local scan limit or a prediction of room classification. Its message is practical: buying media with a lower penetration does very little to fix air that never passes through that media.
Check the test before condemning the hardware
To read an aerosol result, you need the test method, instrument, aerosol, airflow, acceptance limit and upstream challenge record. A photograph showing only a percentage leaves too much out.
Two checks deserve attention:
- Was the challenge representative? The aerosol must reach the filter in a suitable, verified distribution. The test also cannot evaluate a separate bypass path that was never exposed to the challenge. IEST-RP-CC034.5 includes assessment of upstream aerosol uniformity for this reason. IEST test scope
- Was the instrument referenced correctly? A percentage depends on the reference used. ATI documents how an incorrect internal reference can either understate or overstate a reported leak. That is a reason to check the measurement, not a reason to dismiss a failed result. ATI guidance on photometer reference errors
A factory MPPS particle-counting result and a site photometer reading are not interchangeable numbers. Apply the acceptance limit in the actual procedure. Do not select a different threshold after seeing a failure.
Build a useful failure record
The fastest technical investigation starts with a clear record:
- Filter model and serial number, with its factory certificate.
- Housing identification and the approved filter/seat drawing.
- A marked photograph showing the precise leak location.
- Test method, aerosol, measured airflow, upstream reference and acceptance criterion.
- Photographs of the gasket, filter frame and housing seat once the filter can be safely accessed.
- The result before and after each documented corrective action.
The maintenance and qualification teams should then correct the identified cause and repeat the required checks before releasing the system. A housing defect needs a housing correction. A damaged gasket needs the approved seal correction. A defective filter needs repair or replacement under the applicable acceptance procedure.
Changing the filter is justified when the filter is the problem. It is an expensive distraction when the sealing seat is still wrong.
Questions that come up after a failed test
Does a perimeter leak mean the filter manufacturer supplied a defective product?
No. Several parts can cause a perimeter leak: the filter frame and sealant, gasket, housing seat or installation. Record the exact path and inspect both mating parts before deciding the cause.
Can a normal pressure drop prove that the installation is leak-free?
No. A pressure reading records resistance under the measurement conditions. It does not locate small bypass paths or establish that the assembly meets its leakage criterion. Pressure drop and installed integrity answer different questions.
Can I use sealant around the edge and accept the filter if the signal disappears?
Not as an undocumented fix. Any repair must be permitted by the equipment manufacturer and the site’s applicable procedure, with compatible materials and the required retest. Covering the symptom can hide a damaged seat or an incorrect filter fit.